Ridge Gourd Plantation at Home: Secrets to Enjoying the Freshest, Tastiest Turai
Samira Vishwas October 13, 2025 11:25 AM

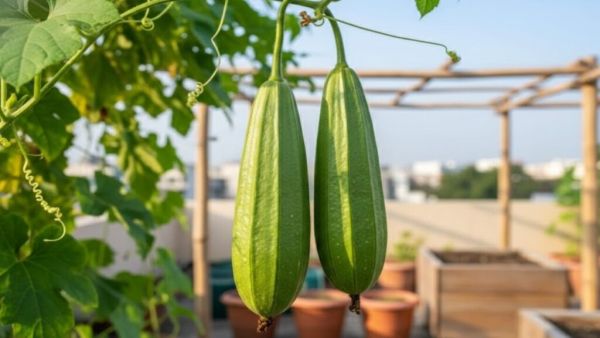
Want to enjoy ridge gourd (Luffa acutangula) that is crisp, sweet, and completely pesticide-free? Growing this vegetable at home is easy, provided you give it the two things it loves most: sunshine and support. Follow this simple guide to establish a healthy, high-yielding vine right on your balcony or terrace.

1. Getting Started: When and Where to Plant

Ridge gourd is a summer vegetable that thrives in heat and humidity.

Best Time to Plant (Season)

Ridge gourd is typically grown during the warm season. In most climates in India, the two best planting periods are:

  1. Summer Crop: February to March (best for the main harvest).
  2. Rainy/Monsoon Crop: June to July.

Wait until the danger of frost has passed and the average temperature is consistently above Celsius.

Choosing Your Spot and Container

Ridge gourd vines grow quickly and can become quite large.

  • Sunlight: Choose a location that receives a minimum of 6 to 8 hours of direct sunlight daily.
  • Container Size: Use large pots or containers, preferably 12 to 18 inches in diameter and depth, for one plant. If using the ground, ensure the area has enough space for the vine to spread.

2. Planting Method: Preparing for the Best Yield

The secret to a successful vine starts with the seed preparation and the right soil mix.

Step 1: Soil Preparation

The soil must be rich, well-aerated, and well-draining.

  • Mix garden soil, coco peat (or sand), and compost (or aged manure) in a ratio. The compost provides the necessary nutrients for its rapid growth.
  • Add a handful of neem cake powder to prevent fungal diseases and pests.

Step 2: Pre-Soaking the Seeds (The Key Trick)

Ridge gourd seeds are tough and can take a long time to germinate. To speed up the process and ensure a high success rate:

  1. Soak the seeds in plain water for 24 hours before planting.
  2. This softens the outer shell and signals the seed to start germination.

Step 3: Sowing the Seeds

  • Sow to seeds per container, about inch deep.
  • Water gently immediately after sowing.
  • Keep the soil moist (but not soggy) until the seedlings emerge, which typically takes to days.
  • Once the plants have true leaves, keep only the healthiest seedling and snip off the others at the base (thinning).

3. Essential Care: The Double-Taste Care Tips

Tip 1: Mandatory Trellising (The Foundation of Success)

This is the most critical step for a good harvest! Ridge gourd is a climber, and allowing it to creep along the ground leads to poor fruit quality, disease, and uneven growth.

  • Install a sturdy support system (a trellis, a mesh, or ropes) immediately after the plant develops its first few leaves.
  • Guide the young tendrils onto the support. Growing the gourd vertically ensures the fruits hang straight, get better sunlight, and stay away from ground pests and moisture. This direct sun exposure and airflow contribute significantly to the gourd’s better taste and texture.

Tip 2: Consistent and Deep Watering

Ridge gourd is a fast-growing, heavy-fruiting plant, so it demands a lot of water.

  • Water deeply and regularly, especially in the summer. The soil should never be allowed to completely dry out.
  • Reduce watering during heavy monsoon rains to prevent root rot.

Tip 3: Fertilization for Continuous Fruiting

Since the plant produces continuously, it needs constant feeding.

  • Initial Feed: days after planting, apply a handful of compost or vermicompost.
  • Fruiting Feed: Once the plant starts flowering (around days), feed it every weeks with liquid fertilizer (like diluted cow dung manure tea or balanced NPK fertilizer).

Tip 4: Pollination (The Gardener’s Role)

Ridge gourd plants produce separate male and female flowers.

  • Male flowers appear first (usually smaller, thin stalk).
  • Female flowers have a small, miniature gourd at their base.
  • If natural pollination by bees is low, you may need to hand-pollinate. Gently rub a soft paintbrush or cotton swab inside the male flower to pick up pollen, and then brush it onto the stigma (center) of the female flower. Do this in the morning.

4. Harvesting Your Fresh Ridge Gourd

Your fresh ridge gourds will be ready for harvest about 60 to 70 days after planting.

  • Harvest the fruit when it is tender, glossy, and still relatively small (about inches long).
  • Do not wait until the gourd becomes dull, hard, or too large, as this significantly degrades the taste and texture.
  • Harvesting regularly encourages the plant to produce more flowers and fruits, extending your growing season!
© Copyright @2025 LIDEA. All Rights Reserved.